Time Tracking Basics
This article shows how to create, enter, and submit weekly timesheets.
Overview
Users can enter actual time in two places:
In a time tracking widget on a Home area dashboard, and
On the Time Tracking>Track page.
[Actual values can be entered on Labor assignment pages by resource managers who have rights to create and modify labor assignments. This operation does not create a timesheet.]
Timesheets can approved by resource managers, project managers, or can be automatically approved when submitted, depending on administration and rights settings .
The color of the status bar (widget) or the timesheet selection button (Time Tracking>Track page) indicates the status of the timesheet:
- Yellow = Open (not yet submitted)
- Blue = Submitted (if auto-approval is turned on, the status will skip directly to Approved)
- Green = Approved
- Dark Green = Adjusted
- Red = Rejected
Home Area Dashboard With Time Tracking Widget
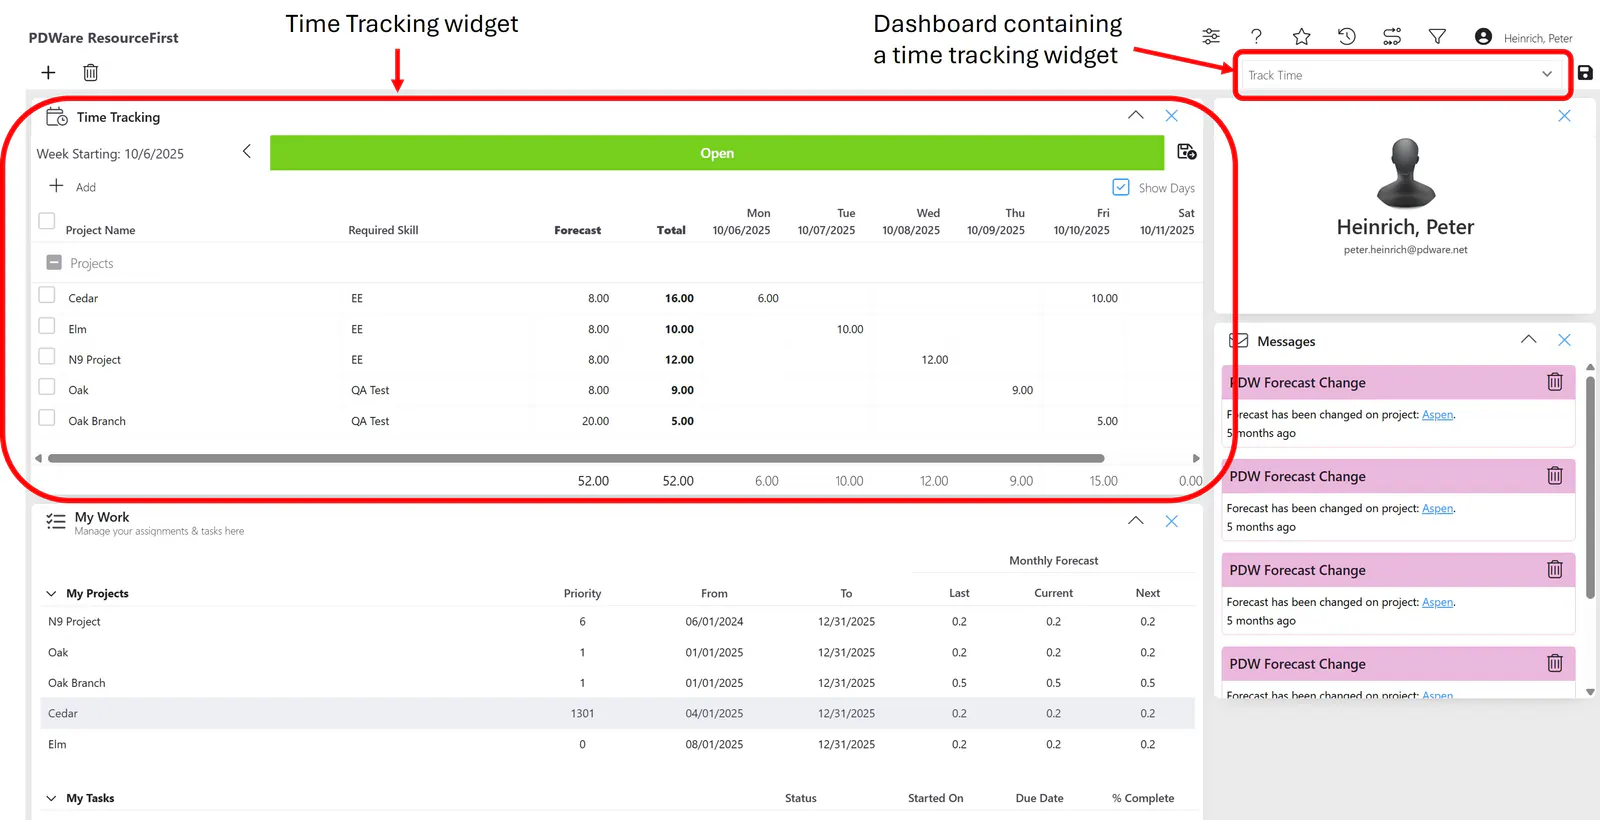
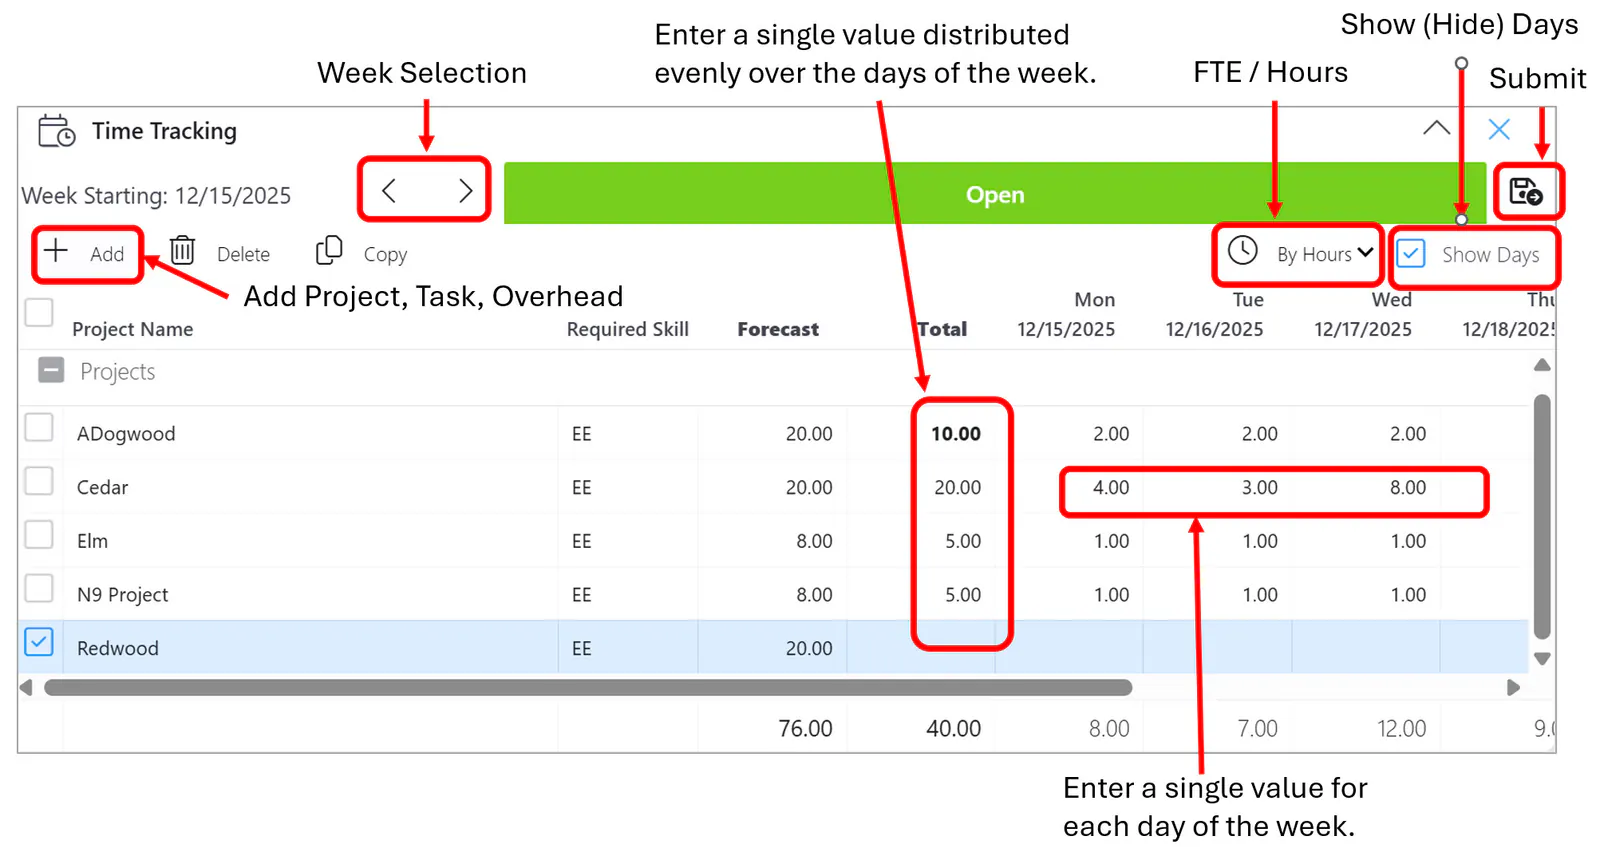
Widget Layout
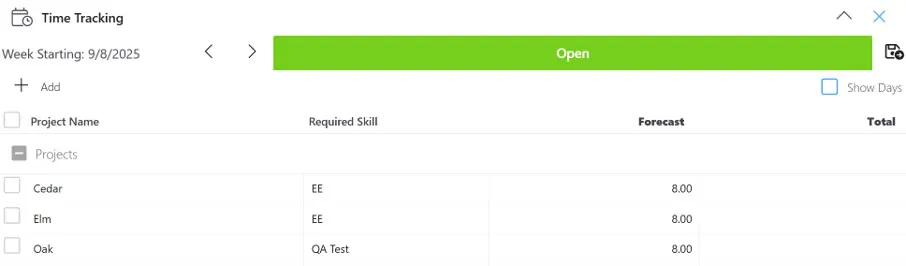
With Days Hidden
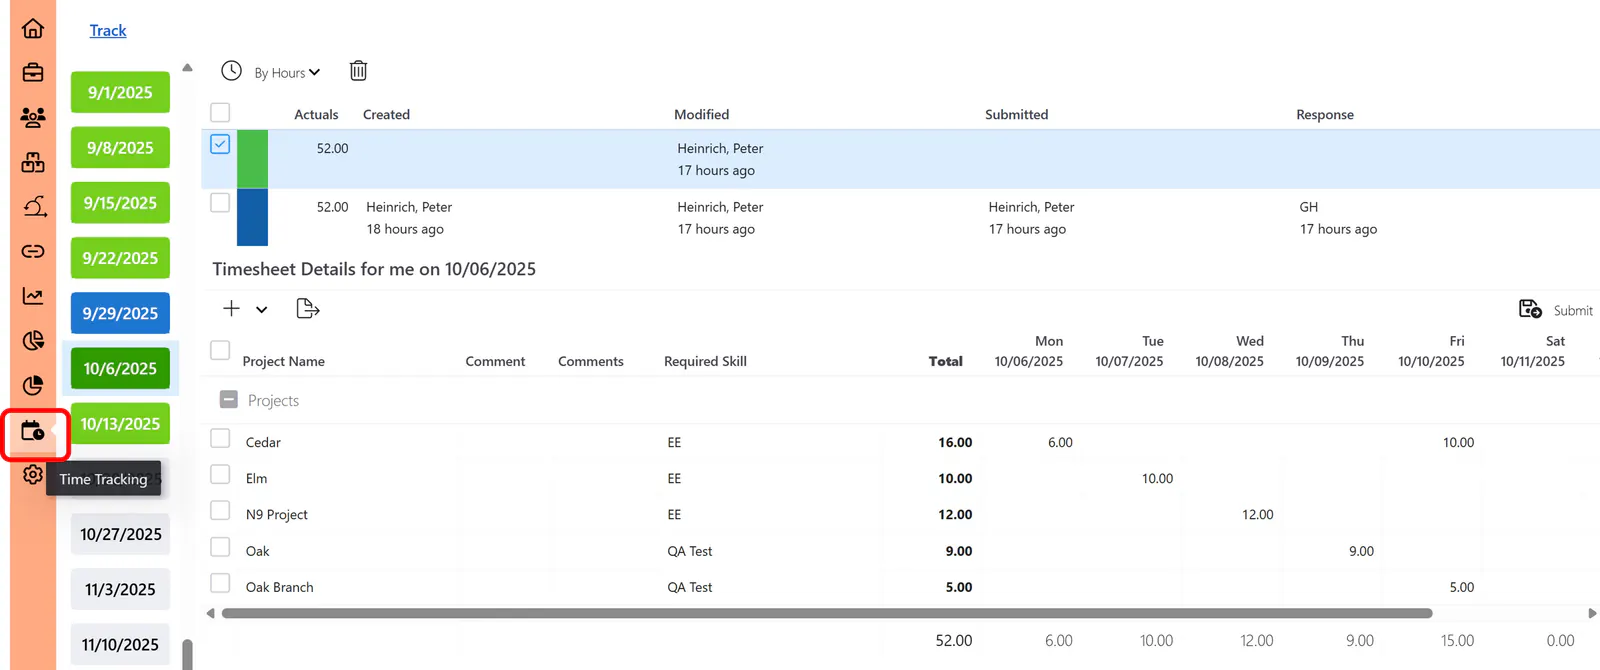
Time Tracking>Track Page
How to – Time Tracking Widget (Easiest Option)
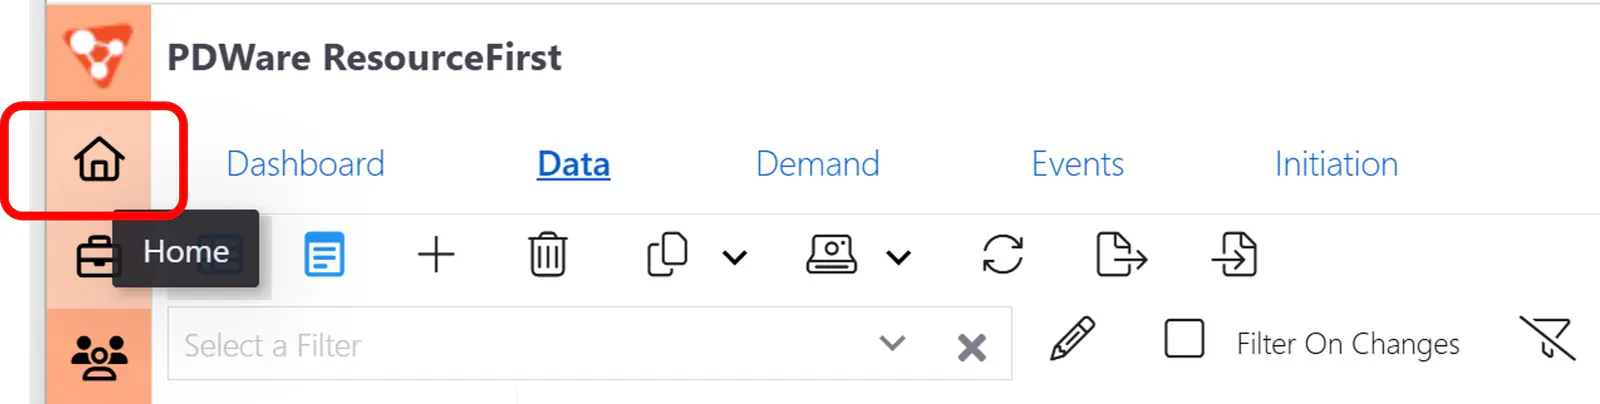
Step1: Go to your Home page.
Step 2: Activate a dashboard that contains the Time Tracking Widget.
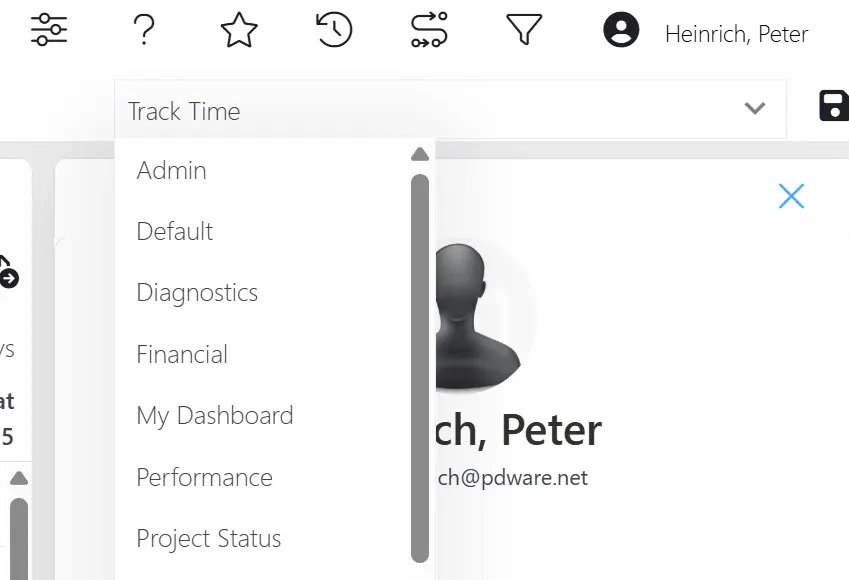
If a dashboard with the time tracking widget is not available, your ResourceFirst Administrator can configure it. See Administering Dashboards and Widgets for details.
Step 3: (Optional) Click Add to create rows for work performed but not planned for this week. (See Add New Rows below.)
Step 4: Enter the hours in the appropriate periods (or enter a total, and it will spread the hours evenly across the week).
Step 5: Click the Submit icon in the upper right to submit the timesheet.
Add New Rows
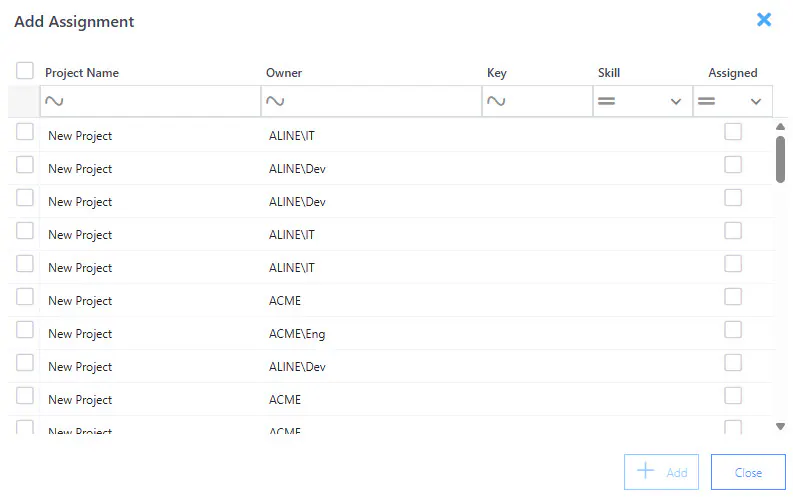
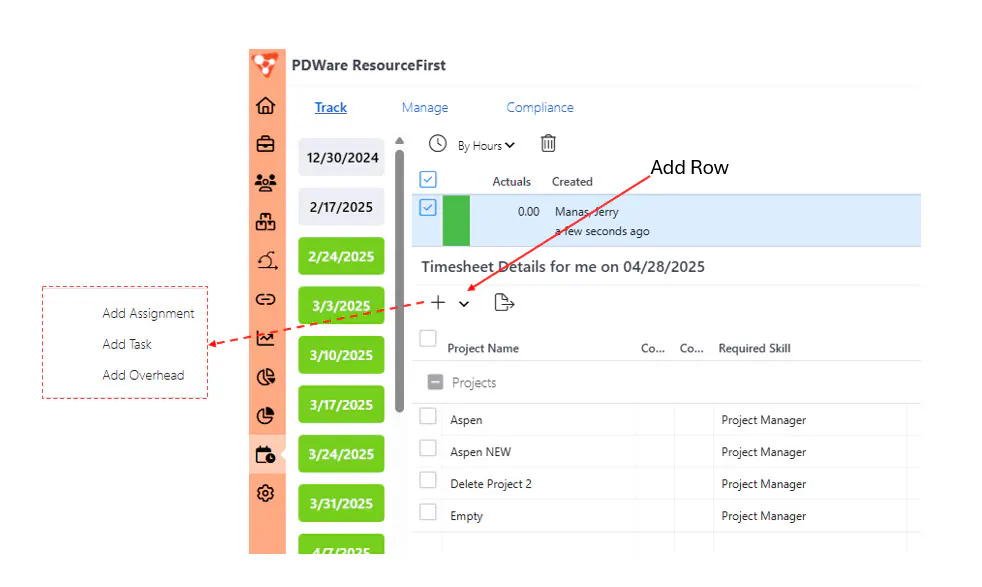
If you worked on a project during the timesheet week but do not have an assignment that week, click the Add icon. The menu options are:
- Add Assignment (i.e. project-level assignments)
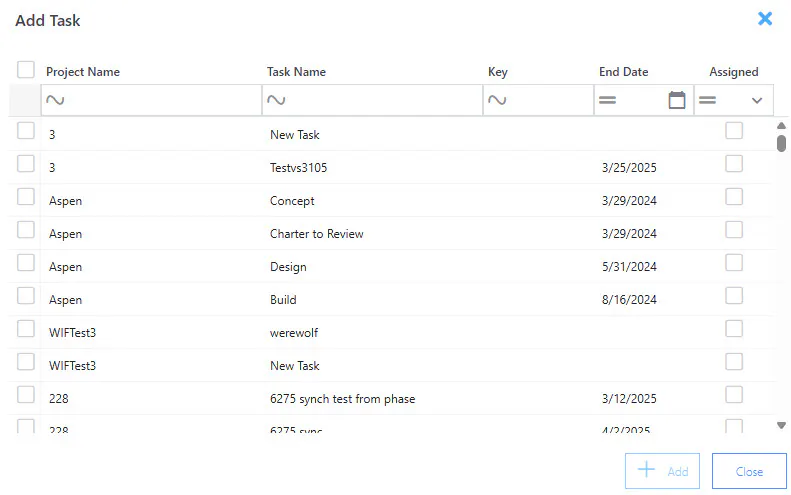
- Add Task (i.e. individual project tasks)
- Add Overhead (as defined by your administrator)
Add Assignment displays this dialog. Select the assignments you worked on during the week and click Add.
If you choose Add Task, the following dialog appears. Select the tasks you worked on and click Add.
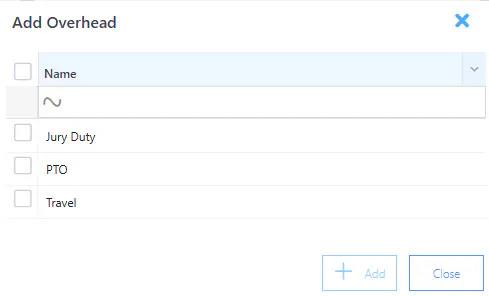
If you choose Add Overhead, the following dialog appears. Select the items you spent time on and click Add.
How To – Time Tracking>Track Page
Step 1: Select the Time Tracking area icon on the Main Menu and select the Track page.
For non-managers, Track is the only option.
Step 2: Click the week button on the Time Period Bar for the week you are reporting time.
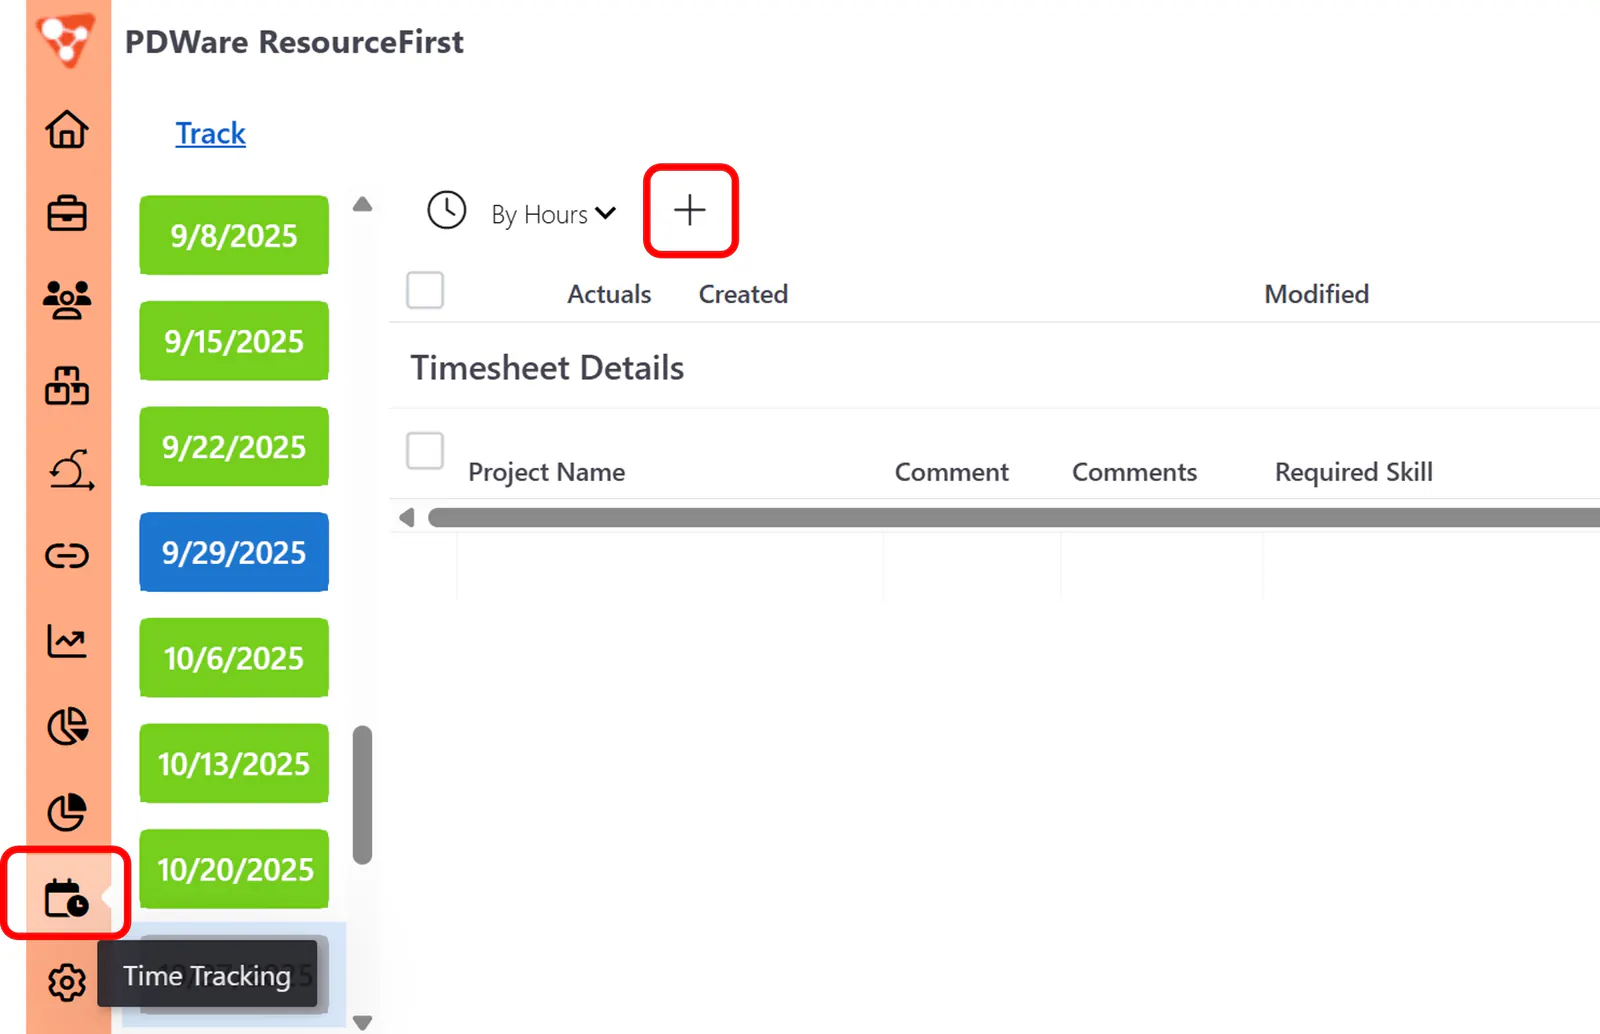
Step 3: Click the  button in the upper left to create a timesheet for the week.
Projects you are assigned to for the period, and projects that you reported time on the previous week, are listed in the timesheet. Anything you worked on that is not listed can be added by clicking the “+” icon.
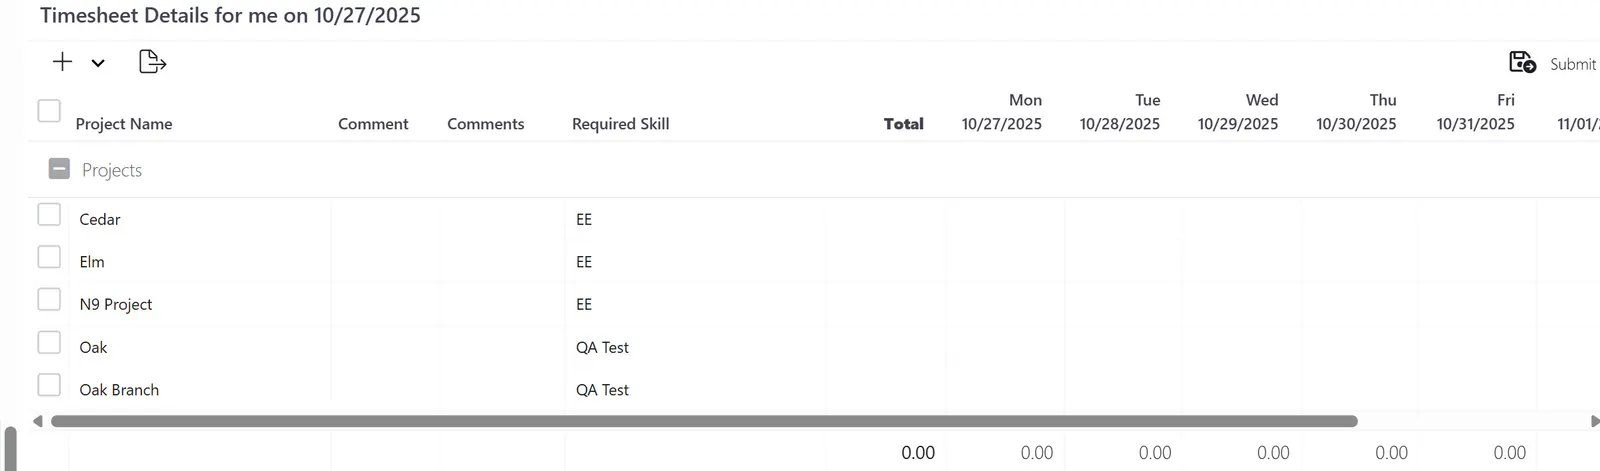
[NOTE: If you wish the existing forecast value to appear as a column for reference, your ResourceFirst administrator can add the Forecast field to the Time view.]
You can fill in the hours by day, or the total hours that will be distributed evenly across the week.
Note that if you are using FTE % and enter a total percentage, the percentage will be replicated for each day.
Step 4: (Optional) Click the Add icon to add unplanned work items.
You can use the filter options to narrow the list:
Step 6: Click the Submit button in the upper right.
Adjusting an Approved or Rejected Timesheet
For an Approved or Rejected timesheet, click the Adjust button (same location as the Submit button). You can then make changes to your timesheet (e.g., adding rows, revising previous numbers, etc.).
Once you begin making changes, the Adjust button converts back to a Submit button. When your changes are complete, click the Submit button to re-submit the timesheet.
Note: You can only adjust timesheets that have been Approved (blue) or Rejected (red).
Track Time in Full Time Equivalent (FTE) percentages
To enter time in FTE percentages instead of hours, toggle the “By Hours” dropdown in the upper left of your screen.
Note: If your administrator set the system to only allow timesheets in hours, you will only see the “By Hours” option.