Creating and Maintaining Users
This article shows how to add new users, associate login IDs with resource names, update passwords, and designate a user as a Project Manager (PM).
Overview
A user in ResourceFirst can log into and access various parts of the system, according to his or her rights.
A user must be associated with a resource defined in the ResourceFirst resource pool in order to be assigned work, issues, or risks, fill out timesheets, etc..
A resource cannot sign in or be granted rights; only users can.
- An example of a user not associated with a resource might be an executive who logs into the system purely to look at reports, and thus does not need to be assigned to work.
- An example of a resource not associated with a user might be a consultant who is assigned to projects but does not sign into the system.
For further information about user rights, see the three articles about rights: Introduction to User Rights, How to Administer User Rights, and Effects of User Rights.
Create and Delete Users
Step 1: Go to the Administration>Users & Rights>Users page.
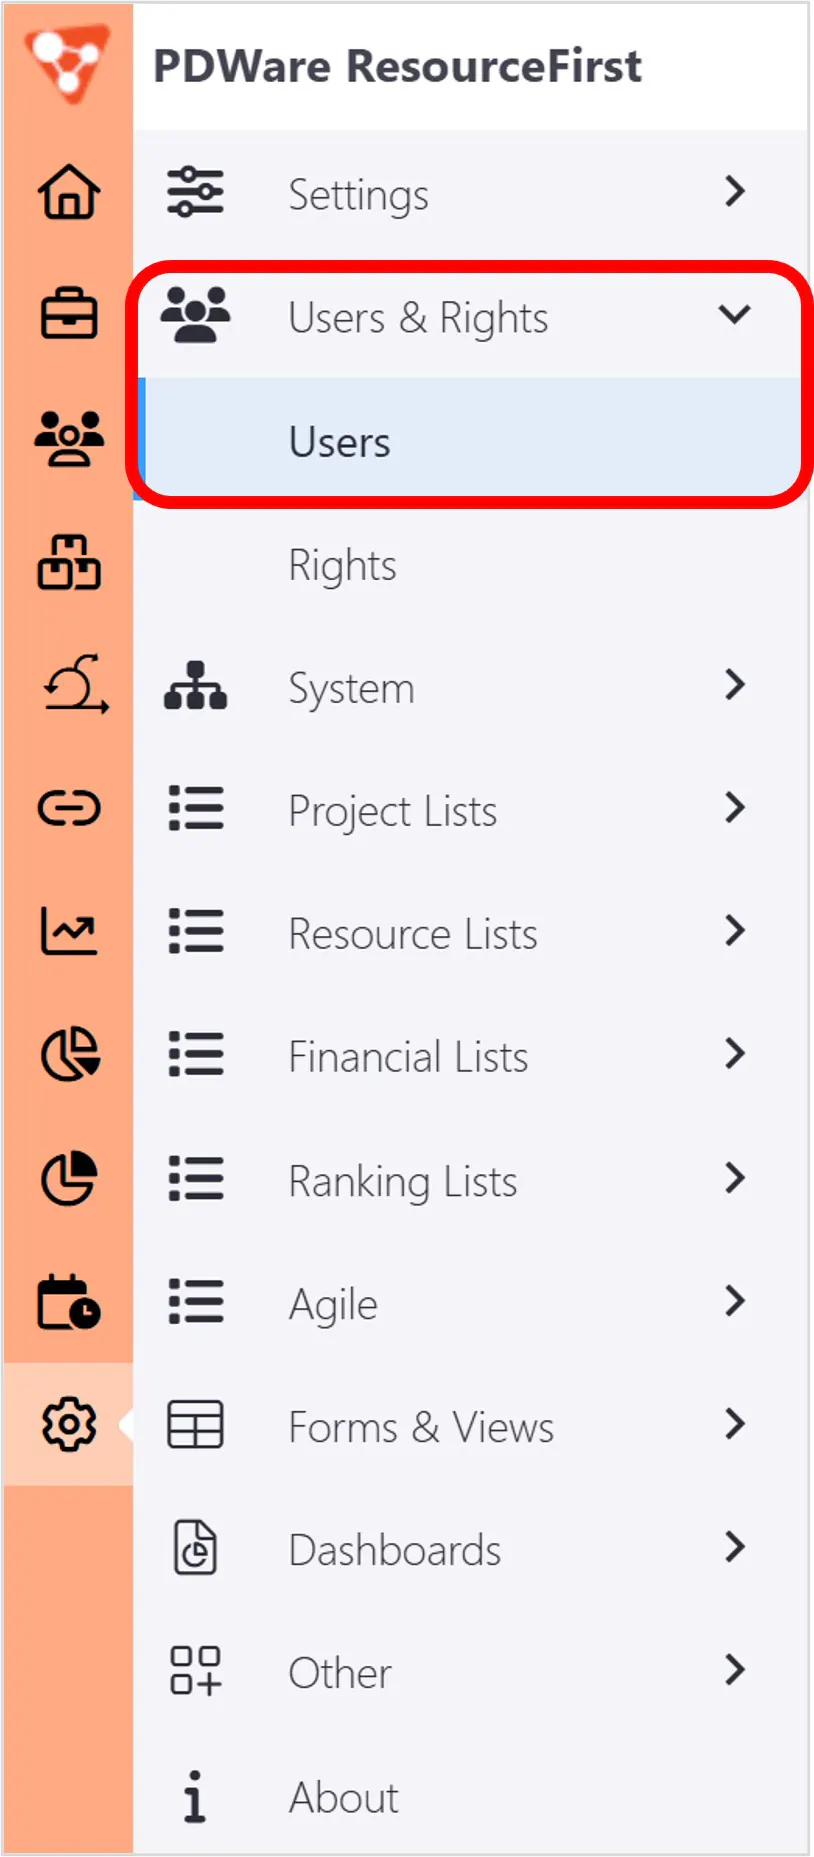
The Users page appears.

Step 2: Click the + icon on the page toolbar and fill in the fields.
(TIP! For the Full Name, use the format “last name, first name”; this makes it easier to find a user in long, sorted lists.)
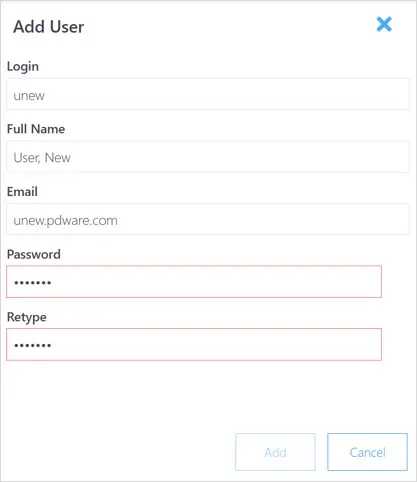
Step 3: Click the Add button.

A row is added with the new user. [Notice there is no id until you click the Save icon.]
Fill in the following attributes as desired:
- Active – Check the box to make the user active. Uncheck to deactivate the user.
- QlikSense – Check the box to give the user access to the QlikSense business reporting module.
- Locked – Check the box to lock the user from logging in.
- is PM – Check the box if the user is a Project Manager. The user will be included in the dropdown list of project managers when adding or editing projects.
- Partition – Specify if the user is in a partition (See Using Partitions for more on partitions)
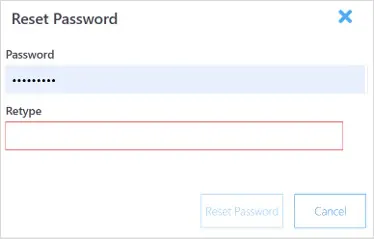
Step 4: Enter a temporary password for the user.
Step 5: Click the Save icon to commit your changes to the database.
Step 6: Go to the Admin>Users & Rights>Rights page and assign appropriate rights to the user.
See the article How to Administer User Rights.
Delete a User
Step 1: Click the selector checkbox at the left of the page for the user(s) you wish to delete.
Step 2: Click the trash can icon to delete the selected user(s).
Step 3: Click the “Yes” button in the “Are you sure . . . ” dialog.
Step 4: Click the Save icon to commit your changes to the database.
Reset a User Password
Step 1: Click the selector checkbox for the user.
Step 2: Click the Reset User Password icon.
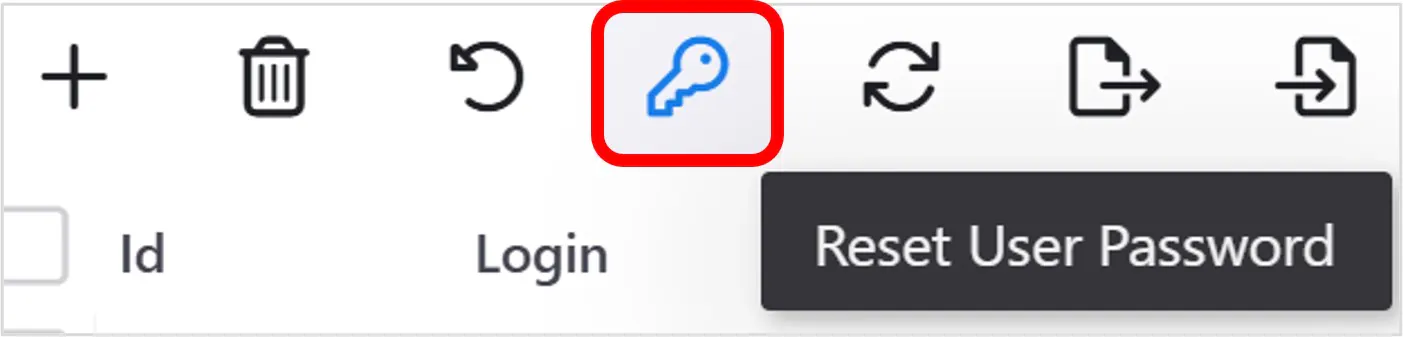
Step 3: Complete the Reset Password dialog and click the Reset Password button.
Step 4. Click the Save icon.
Reset User Cache
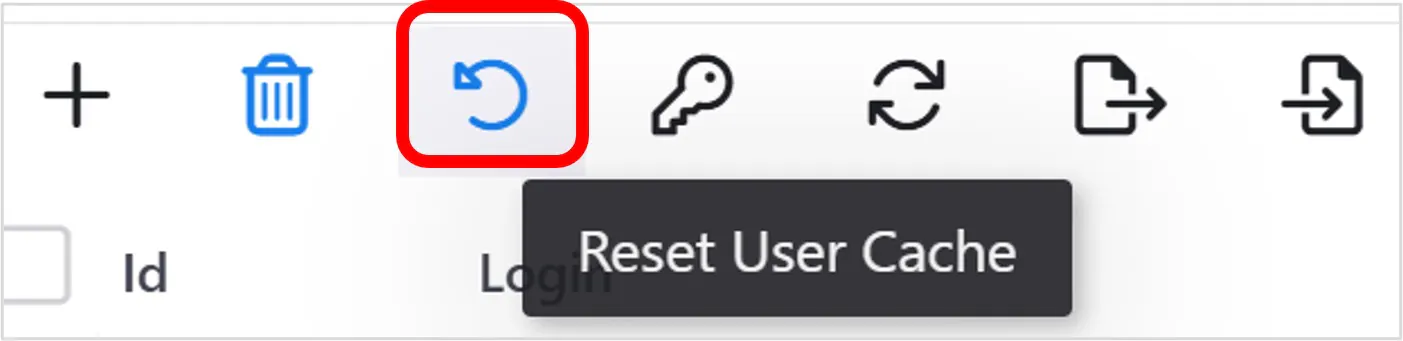
Resetting a user’s cache removes all of the user’s custom configured information such as personal views and filters.
To reset the user(s) cache, click the selector checkbox for the user(s) you wish to reset. Then click the Reset User Cache icon on the page toolbar in the upper left:
Export/Import Users
The two rightmost icons on the page toolbar are for exporting or importing the user list to/from Excel files.
To import Users, the file must contain a “Password” column with a value specified for each user record. If the environment is configured for SSO, the specified password value is not used but is necessary to create the user account(s). All passwords can be the same, non-blank value.
See the Overview section in the article Export and Import Data for an introduction to ResourceFirst export and import.