Export and Import Data
Overview
ResourceFirst is designed to easily export and/or import data directly from your ResourceFirst grid views for resource, project, resource assignment, financial assignment, assets, and scenario data. This article outlines what you need to know and provides Tips & Tricks.
Terminology for Export/Import
“Update” – This import action changes the existing record’s value to the updated import value. For example: A resource has a Primary Skill logged in ResourceFirst as a DBA, but you have updated that value in the import file to be Architect, we refer to this action as an “Update.”
“Add” – This import action inserts a new row in ResourceFirst. For example: A group of new hires needs to be added to ResourceFirst so you add their names to an import file in such a way that ResourceFirst will recognize these additional rows are new and will add them as resource records.
“ID Field” – Each data record has an ID field that holds the unique identifier for that record (PID is the Project ID field, RID is the Resource ID Field, AID is the Assignment ID field, and Asset ID is the Asset ID field). These fields are crucial for imports and are used to determine if an existing record is being updated, or if the ID is blank, a new record is being added.
Where to find the Export/Import icons
You will find the export/import icons  in the upper left Page Toolbar of the following pages:
- Resource Data page (in Grid mode) and Resource Detail Labor Assignments page
- Project Data page (in Grid mode) and Project Detail Labor and Financial Assignments pages
- Asset Data page
- Labor Assignments page
- Financial assignments page
On other view/grid pages, there will only be an export icon  since only project data, resource data, asset data, and assignments can be imported.
How To: Export Data
Who has rights to export data?
You can export the data you see in your views. No additional permissions are necessary.
Generating the Export File
Step 1: On the upper right control panel of the Resources > Data, Projects > Data, and all Assignment pages, click the Export icon to generate an export Excel file for use with Microsoft Excel. The Windows save dialog will open to save the file to your computer.
Step 2: Save the file to the location of your choice (e.g., the Downloads folder).
How-To: Import Data
Who has rights to import data?
Not everyone has rights to import data – you need a minimum of Project Manager (P1) permissions to import data, and that would only be to the project(s) for which you have that right. Contact your ResourceFirst Admin if you need this capability.
Approaches for Importing
Creating the Import Spreadsheet(s): Two methods are available for creating an import file:
- Recommended approach: Reuse a ResourceFirst view export file.
- Alternate approach: Create a new import file from scratch as the import file.
Recommended approach: Reuse a ResourceFirst view export file.
IMPORTANT: After referring to these guidelines, be sure to read the details in the following section for specific field selection, Tips & Tricks, and more: Import Rules used by ResourceFirst to Ensure Data Integrity
Step 1: Reuse the Excel export file generated from the ResourceFirst view export.
- IMPORTANT IF YOU ARE ADDING NEW RECORDS INTO ResourceFirst during the import. If you are adding new records to ResourceFirst by introducing them from the import file, ensure that the import file and the receiving ResourceFirst view have the OBS Node field appropriate for the import type: resource or project or assignment. Refer to the section, OBS Node Path: Configuration Consideration when introducing new records during an Import.
- Adding Additional Fields to the import file: You can add additional fields to your import file by typing the field name into Row 1 to be the column header in the import file. Be sure to type the name of the field such that it exactly matches the letters and spacings as it is in ResourceFirst (the field must exist in ResourceFirst in order to include it). The imported value will be updated in the receiving field regardless of whether the receiving field column is exposed or not on the receiving view.
- Correcting Date Formats in Excel to Short Date: If the export file contains dates, the data in those fields may have converted to default format (e.g., a number like 45997 instead of a date). Be sure to change the field format in Excel to a format of “Short Date.”
Step 2: Run the Import action:
- In ResourceFirst, go to the view from which you generated the export file and click the Import icon
 (at the end of the Page Toolbar in the upper left of the Grid View). Identify the file to import, then import when prompted. The import routine will progress. A successful import results in red carrot markers appearing in the updated fields. Be sure to click Save in the upper right corner to save the newly imported data.
 - You can import multiple times.
- To best understand the importing rules, refer to the section: Import Rules used by ResourceFirst to Ensure Data Integrity
Alternate approach: Create a new import file from scratch as the import file
IMPORTANT: After referring to these guidelines, be sure to read the details in the following section for specific field selection, Tips & Tricks, and more: Import Rules used by ResourceFirst to Ensure Data Integrity
Step 1: Identify the view in ResourceFirst that you will import into and use those fields to create your import file.
- When creating the column headers, transcribe the exact field names’ spelling and spacings between words into the import file’s column header. The sequence of columns in your import file does not need to match that in the ResourceFirst view you are importing into. Field names on import ARE case-sensitive. For example, Pkey is not recognized if the field name is PKey (with a capital K). A misspelled Column Header will be ignored by the import script and will NOT throw an error message. Refer to Administering Fields for how to view the column headings)
- Date Format of the Periods on the Import file: The date format needs to match between the Import file and the receiving ResourceFirst view. The default date formatting in ResourceFirst is mm/dd/yyyy with the actual date being first day of the period being listed (which equates to the Short Date format in Excel): For month, the first day of the month; For week, the first day of your organization’s weekly cycle which most often is either the Sunday or Monday of that week; For Quarter, the first day of the first month of the quarter.
- If you include fields in your import file that are not shown on the ResourceFirst view into which you are importing, the data will still import the values to that field, such that when you reveal that field onto your view, you will see the data.
- ResourceFirst is smart enough to know that the first row in your spreadsheet is the header row. So, your first row could be on Row 1 or 2 or 3, etc. And, your first column can also be something other than Column A, if needed.
- For guidance on updating records and/or adding records with the import file, refer to the section, Import Rules used by ResourceFirst to Ensure Data Integrity
- Microsoft Excel Worksheet file format is the only format supported
- CRITICAL: To ensure proper mapping of data from your import file to the appropriate project, resource, or assignment, you need to include at least one of the following appropriate OBS Node fields as a column: (Refer to this section for more details: OBS Node Path: Configuration Consideration when introducing new records during an Import)
- For a resource import, include two fields, Resource and Resource Org.
- For a project import, include two fields, Project Name and Owner.
- For an assignment import, include three fields, AID or Assignment Org and Resource and Project Name.
- Note: Make sure all Project and Resource OBS nodes referred to in import source files have already been created and are part of the currently filtered scope.
Step 2: Import the Data – Go to the respective tab (Projects > Data, Resources > Data) and click the Import icon (at the end of the Page Toolbar in the upper left of the Grid View). Specify the Excel spreadsheet file to import, then import when prompted. The data should then be imported. You can import multiple times.
Import Rules used by ResourceFirst to Ensure Data Integrity
This information explains the decision tree used by ResourceFirst to ensure record data integrity for:
- Resource data
- Project data
- Resource assignment data
- Skill assignment data
- Financial assignment data
- Scenario data
General Tips and Tricks for Importing:
- Date Format of the Periods on the Import file: The date format needs to match between the Import file and the receiving ResourceFirst view. The default date formatting is mm/dd/yyyy with the actual date being first day of the period being listed (which equates to the Short Date format in Excel): For month, the first day of the month; For week, the first day of your organization’s weekly cycle which most often is either the Sunday or Monday of that week; For Quarter, the first day of the first month of the quarter.
- Rights: You must have the appropriate Rights to complete the update and/or add activities. Check with your ResourceFirst Admin or refer to this article, Administer Rights and Priveleges, for a chart of the ResourceFirst rights.
- OBS Values: If your import file includes an OBS field, the OBS values in your import file must literally match the values in ResourceFirst. ResourceFirst does not permit the creation of new OBS values via import.
- Deleting Values: You cannot delete a value in a ResourceFirst field via the import process. The following workarounds might serve your needs:
- While you cannot null a ResourceFirst numeric field via an import, you can zero-out the numeric ResourceFirst field value by using the number “0” as the imported value.
- Example: Cost Item numeric field in the Import file shows, “14,000.” Modify that to “0” then run the import.
- For deleting list field values and/or text field values, the options include:
- From within ResourceFirst, manually make the adjustments field by field.
- Writing a script to run against the database to programmatically delete the values. Call PDWare Support for guidance on this approach.
- While you cannot null a ResourceFirst numeric field via an import, you can zero-out the numeric ResourceFirst field value by using the number “0” as the imported value.
- Import Failure: If one record fails, the whole import load fails. ResourceFirst provides an explanation of which row and what is missing.
- Save after import: Once the import upload completes in ResourceFirst, be sure to press Save in the upper right corner to save newly imported data.
- Undo: There is no undo button. However, if you want to restore a data set after an import and before clicking Save go to the Data Load Parameters (funnel icon on the application toolbar) and click Reload. This will restore your data back to its state before the import. Once you click Save your data is updated and is not recoverable.
- Importing User Defined Fields (UDFs): When importing data, an invalid UDF list value CAN be imported and will appear in the record. However, if the user then edits the cell, the incorrect value does not appear in the list. Pressing the Enter key clears the value. Or, to maintain the imported value without editing, click the ESC button.
Effect of Data Locking on Imports
Data locks can also impact the ability to import data. Below are the impacts of various types of data locks:
- You cannot import updates to a locked assignment (i.e, its ALocked flag is set to “Y”). It will kick out as an error.
- You cannot import new or updated projects, resources, or assignments to a node that is locked.
- You cannot import assignments for a project that is in a locked project state.
- You cannot import assignments for a project that has its “Lock Forecast” flag set to “Y”.
- You CAN import Scenarios (provided they are not in a locked state) to a node that is locked.
- You CAN import Scenario assignments (provided they are not in a locked scenario), even if the equivalent non-scenario project or assignment is locked.
For more on the types of data locks in ResourceFirst, see Data Locking in ResourceFirst.
Resource Data Import Considerations:
Tips & Tricks:
- Duplicate Resource names are allowed, even in the same node. Resource Keys (which typically contain the user the resource is associated with) are expected to be unique. The RID (Resource ID) is always unique and is system generated.
- For general Tips and Tricks, go to: General Tips and Tricks
UPDATING existing resource records via an import
Required fields: The following reflects the minimum required fields to update an existing resource via an import file. You can include additional fields beyond this list, as needed.
- RID – Unique Resource Identifier
- Resource – Resource Name
- Resource Org – The resource’s home organization; (field id: RNODEPATH)
- For formatting details, refer to OBS Node Path: Configuration Consideration when introducing new records during an Import
How does the RID field impact a resource data update?
- If the import file includes the RID field along with the Resource and the Resource Org fields, the RID value is considered first for mapping to the correct resource. What this means is that if there is a mismatch between the RID field and the Resource, the RID field takes precedence, and that resource record receives the update.
Can there be two resources with identical resource names?
- Yes. Duplicate resource names are allowed, even in the same node. Resource Keys are expected to be unique though, and the RID is always unique.
CREATING new resource records via an import file
Required fields: The following two fields are required to create a new resource via an import file. You can include additional fields beyond this list, as needed.
- Resource Name – Resource Name
- Note: ResourceFirst will permit the creation of a duplicate resource name. Resource Keys are expected to be unique though.
- Resource Org – The organization responsible for the resource; (field id: RNODEPATH)
- For formatting details, refer to OBS Node Path: Configuration Consideration when introducing new records during an Import
- Note: Key or RID – If present on the import file, it must be blank. However, it is not required to be on the import file.
- A blank Key field and/or RID field in combination with a Resource Name and Resource Org field, each having values, signals ResourceFirst to create a new resource record upon import.
- Note: Upon completion of the import, the new record will be assigned a RID value after you click the Save icon in the upper right of the view.
Project Data Import Considerations:
Tips & Tricks:
- Phases and milestones and their respective dates cannot be imported. These need to be manually created from within ResourceFirst.
- Guideline: If only adding new records, do not include the PID field on an import file.
- Go to: General Tips and Tricks
UPDATING data on existing projects via an import file
Required fields: The following two fields are needed to map the update to the appropriate project. You can include additional fields beyond this list, as needed.
- PID – the project’s unique identifier
- Project Name – Project Name
CREATING new project records via an import file
Required fields: The following two fields are required to create a new project via an import file. You can include additional fields beyond this list, as needed. Do NOT include PID on the import file when creating new records.
- Project Name – Project Name
- Note: If Project Name you provide is the same as an existing project record, the existing project record will get updated.
- Owner – The organization responsible for the project; (field id: PNODEPATH)
- For formatting details, refer to OBS Node Path: Configuration Consideration when introducing new records during an Import
- Important: Upon completion of the import, click the Save icon in the upper right of the view to complete the creation of the new project record.
Resource Assignment Data Import Considerations:
Tips & Tricks:
- Separate import files – While ResourceFirst will import a file that has a combination of resource and skill assignment updates and adds, from a practical aspect it may be easiest to create separate import files, one for resource and the other for skill assignments.
- Confirm Your Assignment Nodes – Make sure all assignment org nodes used in the import file have already been created in ResourceFirst and are part of the current Data Load Parameters (funnel icon on Application Toolbar).
- Proper OBS node formatting – When importing assignment data and providing OBS node info for skill assignments, populate the Assignment Org import field with the full path name. Specifically, the path needs to include “\” separating the nodes. Do NOT use the fields that present the individual Org, Level2, etc. fields.
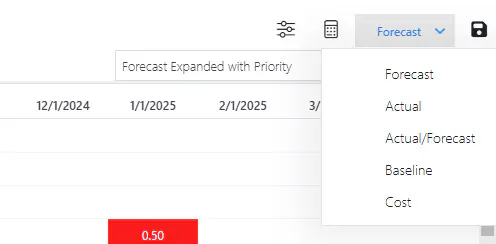
- Forecast, Actual, and Cost Assignment data can be imported – The key to do this correctly is to ensure that the ResourceFirst view into which you are importing is toggled to the value type you are importing. To import forecasts, toggle to Forecast. To import actuals, toggle to Actual. To import costs, toggle to Cost. Find this toggle in the upper ribbon to the far right.
- Synchronize the Units – Ensure the ResourceFirst Assignments page and import file are each using FTE or hours (not mismatched!).
- You can import multiple times. The system will add records that don’t exist, and update records that do.
- Time ranges – Import process technical notes: Period data columns in the import file that are not present in Assignment view are not imported, and do NOT result in errors if you try to import them.
- For additional Tips and Tricks, go to: General Tips and Tricks
UPDATING data on existing named resource assignments via an import file
Required field: The following field is required on the import file to map the update to the appropriate named resource assignment. You can include additional fields beyond this list, as needed.
- AID – Every named resource assignment has a unique AID value. Use the AID value as the identifier field.
While it is always best to use the AID for explicit matching, there will be situations where it is easier to use one of the following field combinations to properly identify the named resource assignment to be updated rather than using the AID:
- Field combination 1: Project Name and Resource
- Field combination 2: Project Name and resource Key
Note: If export/importing assignments with scenarios, Pkey (Project Key) is a required field as well. It is good practice to always include this field regardless.
CREATING new named resource assignment records via an import file
When creating new named resource assignments, the AID field is left empty on the import file (or you could even exclude that column from the import file). An empty AID value in combination with one of the two field combinations will prompt ResourceFirst to create a new named resource assignment.
Be sure that the project and resource for the assignment exist in the system.
Required fields: One of the two following field combinations is required on the import file to map the update to the appropriate named resource assignment. You can include additional fields beyond this list, as needed. It is always best to use the IDs (Combination 2) where possible, as multiple projects can have the same name.
- Field combination 1: Project Name and Resource
- Field combination 2: PID and RID
Skill Assignment Data Import Considerations:
Tips & Tricks:
- Separate import files – While ResourceFirst will import a file that has a combination of resource and skill assignment updates and adds, from a practical aspect it may be easiest to create separate import files, one for Resource and the other for Skill assignments.
- Confirm Your Assignment Nodes – Make sure all Assignment Org nodes used in the import file have already been created in ResourceFirst and are part of the
- current Data Load Parameters (funnel icon on Application Toolbar).
- Proper OBS node formatting – When importing Assignment Data and providing OBS node info for Skill assignments, populate the Assignment Org import field with the full path name. Specifically, the path needs to include “\” separating the nodes. Do NOT use the fields that present the individual Org, Level2, etc. fields.
- Forecast, Actual, and Cost Assignment data can be imported – The key to do this correctly is to ensure that the ResourceFirst view into which you are importing is toggled to the value type you are importing. To import forecasts, toggle to Forecast. To import actuals, toggle to Actual. To import costs, toggle to Cost. Find this toggle in the upper ribbon to the far right.
- Synchronize the Units – Ensure the ResourceFirst Assignments page and import file are each using FTE or hours (not mismatched!).
- You can import multiple times. The system will add records that don’t exist, and update records that do.
- Time ranges – Import Process Technical Notes: Period data columns in the import file that are not present in Assignment view are not imported, and do NOT result in errors.
- For additional Tips and Tricks, go to: General Tips and Tricks
UPDATING data on existing skill assignment records via an import file
Required field: The following field is required to map the update to the appropriate skill assignment. You can include additional fields beyond this list, as needed.
- AID – Every skill assignment has a unique AID value. Use the AID value as the identifier field.
While it is always best to use the AID for explicit matching, there will be situations where it is easier to use one of the following field combinations to properly identify the skill assignment to be updated rather than using the AID:
- Field combination: Project Name, Required Skill, and Assignment Org
IMPORTANT: Resource field – this field is not required to be on the import file but if it is, leave the field blank; this signals to ResourceFirst that it is a skill assignment row. If you populate this field, ResourceFirst will consider it as an update to that resource’s assignment.
Note: If export/importing assignments with scenarios, Pkey (Project Key) is a required field as well. It is good practice to always include this field regardless.
CREATING new skill assignment records via an import file
Required fields: The following fields are required to create new skill assignment via an import file. You can include additional fields beyond this list, as needed.
- AID – When creating new skill assignments, the AID field needs to be on the import file and empty. An empty AID value in combination with the following required fields will prompt ResourceFirst to create a new skill assignment.
- Project Name – Project name
- Required Skill – Skill being requested for the assignment
- Assignment Org – The OBS Node from which the skill in being requested. For formatting details, refer to OBS Node Path: Configuration Consideration when introducing new records during an Import
IMPORTANT: Resource field – this field is not required to be on the import file but if it is, leave the field blank; this signals to ResourceFirst that it is a skill assignment row. If you populate this field, ResourceFirst will consider it as an update to that resource’s assignment.
Financial Assignment Data Import Considerations:
For Financial Assignment data, include the following fields. You can include additional fields beyond this list, as needed.
- AID – ResourceFirst assigned unique identifier for each financial assignment. Have this on the import file even if you are importing new financial transactions. An empty AID field signals ResourceFirst that the row is new to the system and to set an AID value when you press Save.
- Assignment Org – Associates the assignment with the appropriate OBS node
- Project Name – The project to which the assignment is being applied
- Cost Item – works in coordination with Financial Category field; common values could be Capital, Expense, Training; your organization may choose to use this field differently.
- Financial Category – works in coordination with Cost Item field; common values could be Capital, Expense; your organization may choose to use this field differently
A sample view receiving this import would minimally look like this:

Tips & Tricks:
- Determining if your imported financial assignment values are logged as Forecast currency numbers or as Actual currency numbers: For import, there is only one field called Cost Item – there is no field distinction for Forecast numbers vs. Actual numbers . What determines if your imported values are registered as forecast or as actuals is the View into which you are importing If it is the Forecast view, then the imported numbers are forecast values. Likewise, if you are in the Actuals view, then the imported numbers are actuals values.
- Confirm Your Assignment Nodes – Make sure all Assignment Org nodes used in the import file have already been created in ResourceFirst and are part of the current Get Data filters.
- Proper OBS node formatting – When importing Assignment Data and providing OBS node info for Skill assignments, populate the Assignment Org import field with the full path name. Specifically, the path needs to include “\” separating the nodes. Do NOT use the fields that present the individual Org, Level2, etc. fields.
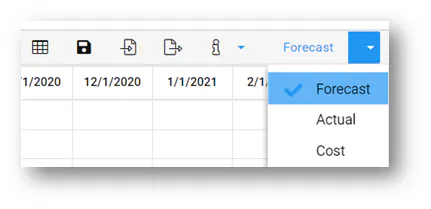
- Forecast, Actual, and Cost Assignment data can be imported – The key to do this correctly is to ensure that the ResourceFirst view into which you are importing is toggled to the value type you are importing. To import forecasts, toggle to Forecast. To import actuals, toggle to Actual. To import costs, toggle to Cost. Find this toggle in the upper ribbon to the far right.
- Synchronize the Units – Ensure the ResourceFirst Assignments page and import file are each using FTE or hours (not mismatched!).
- You can import multiple times. The system will add records that don’t exist, and update records that do.
- Time ranges – Import Process Technical Notes: Period data columns in the import file that are not present in Assignment view are not imported, and do NOT result in errors.
- For additional Tips and Tricks, go to: General Tips and Tricks
IMPORTING Scenario Data
Scenario assignment rows are found on two Assignment pages: The Labor page shared by the Resource and Project menus, and the Financial Assignment page. When importing scenario assignment data and/or creating new scenario assignments via an import, consider the following information.
Tips & Tricks:
- Determining if your Imported Cost Item values are logged as Forecast currency numbers or as Actual currency numbers: For import, there is only one field called Cost Item – there is no field distinction for Forecast numbers vs. Actual numbers. What determines if your imported values are registered as forecast or as actuals is the View you are importing into. If it is the Forecast view, then the imported numbers are forecast values. Likewise, if you are in the Actuals view, then the imported numbers are actuals values.
- Scenario Name is not considered by the import script so do not consider it as a unique identifier field. Instead, the Key (Project) field is one of the two fields (AID is the other field) used by the import to identify the appropriate scenario record to update.
When importing updated scenario assignment data to the Assignment page shared by the Resource and Project menus include ONE OR BOTH of the two following fields:
- AID – When looking at scenario information, this is the scenario assignment’s AID. Internal PDWare database ID (system assigned numeric value)
- Key of the Scenario Project – ResourceFirst copies the Scenario’s name into this field and uses it as an identifying field during the import.
Other fields commonly used on a project/resource assignment scenario view:
- Original AID – This is the originating assignment’s AID to which the scenario belongs. Internal PDWare database ID (system assigned numeric value)
- PID – When looking at scenario information, this is the scenario project’s PID. Internal PDWare database ID (system assigned numeric value)
- Original PID – This is the originating project’s PID to which the scenario belongs. Internal PDWare database ID (system assigned numeric value)
- Scenario Name – Scenario Name
- Scenario Status – Indicates where in the process the scenario is located.
- Scenario Version – Scenario version
- Owner – The OBS Node the project is associated with.
- Project Name – Project name to which the scenario belongs.
When importing updated scenario assignment data to the Financial Assignment page include ONE OR BOTH of the two following fields when importing assignment data.
- AID – When looking at scenario information, this is the scenario assignment’s AID. Internal PDWare database ID (system assigned numeric value)
- Key of the Scenario Project – ResourceFirst copies the Scenario’s name into this field and uses it as an identifying field during the import.
Other fields commonly used on a Financial Scenario view:
- Original AID – This is the originating assignment’s AID to which the scenario belongs. Internal PDWare database ID (system assigned numeric value)
- Cost Item – This is the field holding the currency amounts. This field has three columns associated with it: Cost Item, Total, and the Date Periods
- PID – When looking at scenario information, this is the scenario project’s PID. Internal PDWare database ID (system assigned numeric value)
- Original PID – This is the originating project’s PID to which the scenario belongs. Internal PDWare database ID (system assigned numeric value)
- Scenario Name – Scenario Name
- Scenario Status – Indicates where in the process the scenario is located.
- Scenario Version – Scenario version
- Assignment Org – IMPORTANT; this associates the costs to the appropriate project OBS node.
- Project Name – Project name to which the scenario belongs.
CREATING Scenario assignment records
- Project Key of the Scenario project is required; you will find that this value is the Scenario’s name.
OBS Node Path: Configuration Consideration when importing new records
To import project, resource, or assignment data into ResourceFirst, it is best to follow the general guidelines below:
- IMPORTANT: When creating new records with an import file, ensure that the appropriate OBS Node Path field is an included column in the import file. And, you can also have the corresponding field in the ResourceFirst view receiving the import. (See Administering Column Headings for help with configuring view columns.)
- For resource related imports, include the Resource Org field (id: RNODEPATH)
- For project related imports, include the Owner field (id: PNODEPATH)
- For assignment related imports, include the Assignment Org field (id: ANODEPATH)
- For example, you may be creating an export file from the resource data page with intentions of adding new resources to ResourceFirst, you can add new rows to the exported .csv file and then import the file. Ensure that you have the Resource Org field as a column in the view used to create the export .csv file.
- Confirm the OBS Nodes – Make sure all OBS nodes used in the import file have already been created in ResourceFirst and are part of the current Get Data filters.
- Proper OBS node field formatting – When using these fields – Resource Org, Owner, or Assignment Org – be sure to use the full path name. Specifically, the path needs to include “\” separating the nodes. And, the string should not end with a backslash: i.e. This is proper: “Company\Department 1”; not this: “Company\Department 1\”