Project Events, Risks and Issues
This article demonstrates how to enter and manage risks, issues, outcomes, and other events for an individual project.
Overview
The Events feature allows tracking of project risks, issues, outcomes, change requests, and other events related to the project.
This article explores how to add and update events for a specific project. For information on the global Events page that shows all events across all projects for the current active portfolio, see Project Events.
Event types are defined in Administration>Lists>Project Event Types. Defaults are Risks and Issues, but other event types can be added as well, such as changes, outcomes, etc. You can even add User Defined fields for each event type as desired. For example, an Outcome event might need an Achievability status.
It is always best to use a User Defined Field for additional statuses, and not change the Impact or Probability field names, as those have fixed functionality.
User Defined Fields for Events: You can define up to 15 User Defined Fields (UDFs) associated with each event type. These fields will appear on the Event form for that type. If you wish an Event UDF to be a dropdown, you can define a list for that field by going to Administration–>UDFs and selecting the Events type. Then create the list and list items accordingly.
For more on setting up event types, see Administering Lists and navigate to the section on Project Event Types and on UDFs.
Regarding risks and issues:
- A risk is something that “might happen” and is assigned a probability and impact, as well as someone assigned to manage the risk, if applicable.
- An issue is something that is currently happening as is assigned to someone to act on.
Risks and Issues appear in project status reports in the Business Analytics Qlik dashboards, as do other events.
How To
Accessing the Events Tab
Step 1: Click on the Events tab in the Project Workspace (accessible by clicking on any project hyperlink from a page that lists projects).
You will be presented with the screen pictured below. In the below example, Change Requests is the first event type in the defined Project Event Types list, so the page defaults to show Change Request. The system remembers the last event type you were on, even after logoff.
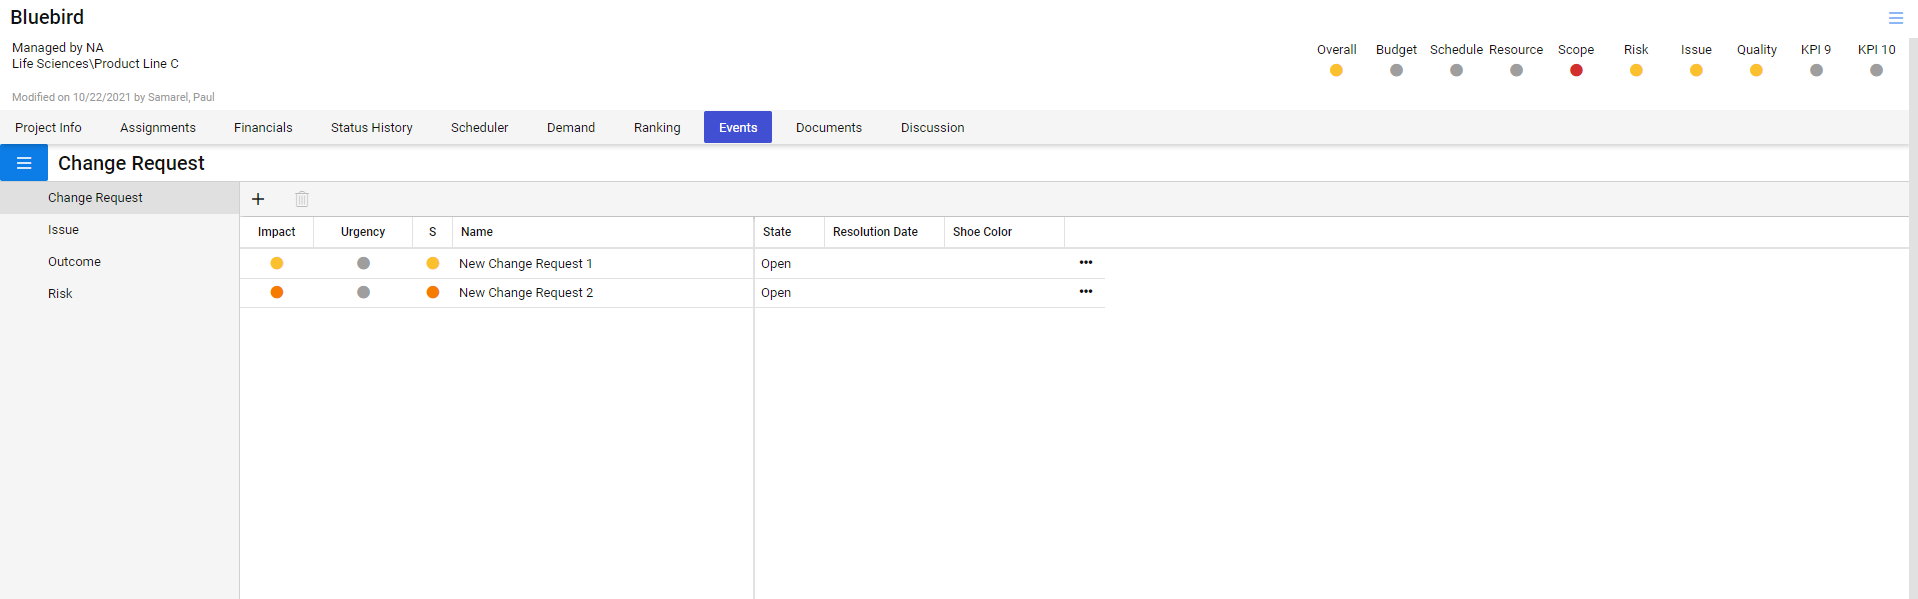
Step 2: To see other event types, click the hamburger icon  in the upper left of the page, just below the Project Info header. All event types defined in Administration > Lists > Project Event Types will appear as options on the left, as depicted below:

Step 3: Click the three dots to the right of each event row  to open the Event page, where you can update data as needed. Below is an example of a change request with the details open. Note the SAVE button in the bottom right. You must save any changes.

Add a New Event
Step 1: Navigate to the desired event type on the left (the left panel appears when the hamburger icon is clicked). Then click the plus sign in the upper left. 
In the example below, the event type of Risk is shown. The plus sign was clicked and a new row appears at the top, called “New Risk.”

Step 2: Click the three dots to open the details page, where you can enter details as desired.
Step 3: Click the Save button in the lower right to save the data.

Delete an Event
Step 1: Navigate to the desired event type on the left (the left panel appears when the hamburger icon is clicked).
Step 2: Select an event row by clicking on it, then click the trash can icon in the upper left. 
Step 3: Click the Save button in the lower right to save the deletion.
Status Indicators
To the left of each row, you will notice up to three color indicators. The first two indicators represent the Impact and Probability fields. The rightmost indicator indicates the event’s “Score.” This is a composite GYR score, calculated based on the Impact and Probability fields. This field is not shown for Issues, since issues only have the “Impact” indicator.
Impact and probability is defined in terms of 5 levels, as shown below. These levels are fixed and the names cannot be changed without customization. Therefore, instead of renaming either of these fields to something with a different meaning, use a UDF for other status types.

