This article shows how to set your global data filters and date ranges, which together determine the data set you will see when using ResourceFirst.
The Global Funnel Filter, indicated by the funnel icon in the upper right of your ResourceFirst screen, is where you will set which projects and resources you will see in your session, as well as the date ranges for labor and financials. You can also select additional check boxes and field-level filters to fine tune which data you see. The filter settings remain until you change them again, even if you log off.
Important! When using ResourceFirst, the first thing you should do is use the Global Filter icon to set your scope and then press the Reload Data (bottom right corner.) This determines your “portfolio” that you’re working with.
One of the most common problems is people forgetting to do this and wondering why they’re not seeing their data.

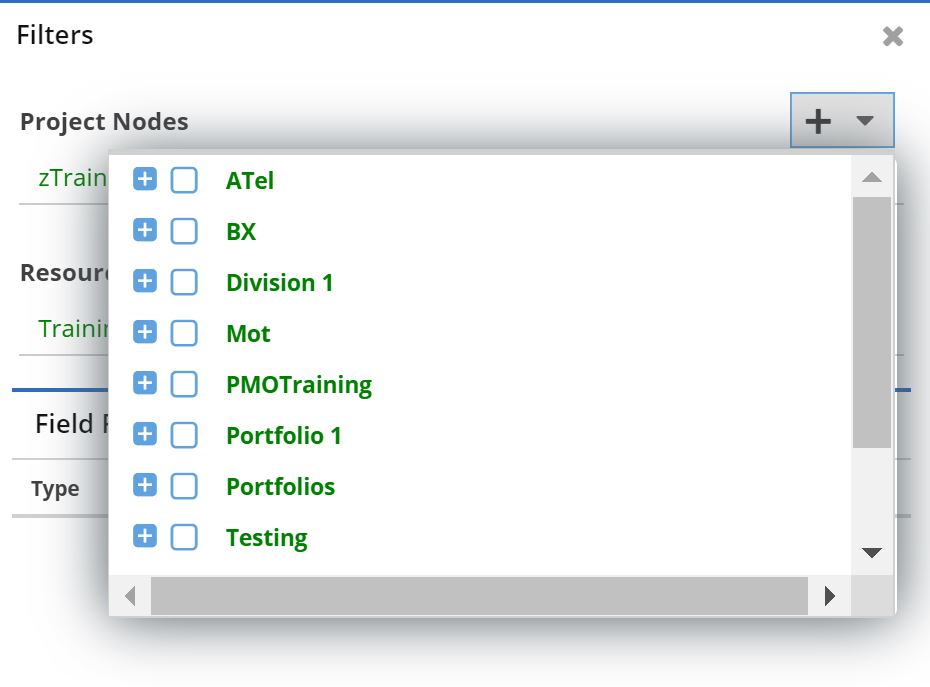
To select or change nodes in the Project Nodes or the Resource Nodes filters, click the + dropdown to the right of the Project Nodes or Resource Nodes sections. The following dialog will appear, allowing you to select or remove multiple nodes or sub-nodes.
The Data Parameters section allows you to set the date range for your session, including start date, period type, number of periods, and whether you’d like to see units in hours (the default is FTEs or Full Time Equivalents).

On ResourceFirst versions prior to 2020, the date range is set using the Date Range dropdown on in the Assignments, Utilization, and other pages. Instructions are as follows:
The  icon in Assignments, Utilization, and other relevant contexts allows setting the visible data range (the start date, granularity type and number of periods).
You can also specify if you prefer to see Units in Hours (vs. the default, FTEs or Full Time Equivalents). With FTEs, you’ll enter 1 to represent the equivalent of a full time person, or .5 to represent half time, etc.
Note that the hours per 1 day FTE can be set in the Server Settings page in Administration (“Hours Per 1 Day FTE” defaults to 8).

Note: If you are a Partition Administrator, you will see a Share button at the bottom of the dialog, which will allow you to share your filter setting with all users in your partition. See Using Partitions for more information.
In addition to OBS filters, Date Range Filters, and Field Filters, there are several check boxes in the Global Filter dialog, as below:


Note: Field filter selection how has dropdowns, with type-ahead on values. Also, field filter settings are sticky. When you log off and on again, they’ll still be selected.
For more information on partitioning, refer to: Using Partitions
There may be a default Global Filter setting that a partition group would like new users to access. From that point forward, the partition member can modify the Global Filter settings as needed. The Partition Administrator defines the Global Filter settings.
Two steps to sharing the Global Filter default setting with the partition members:
Step 1: Set the Global Filter to the default settings you want to share. Then, press Reload. Lastly, go back into the Global Settings and press Share for that to be shared.
Step 2: Go to Admin>Lists>Users. For those partition users who you want to reset, go to their row and on the far right of their row press the Reset button. (see screen shot below) Note: If the user is logged in while you are resetting the account, any user action will take precedence. For the reset to work the user must log out then back in.
